Have you ever wondered how you make espresso powder at home? Whether you're a baking enthusiast or just love the idea of homemade ingredients, making your own espresso powder is simpler than you might think. Plus, it adds a unique touch to your recipes that store-bought versions just can't compete with. Let's dive into this DIY guide and turn you into a home barista!
What is in espresso powder?

First things first, what is in espresso powder? Espresso powder is a super concentrated, finely ground form of espresso beans. Unlike instant coffee, which is brewed coffee that's been dehydrated, espresso powder is made from espresso beans that are brewed, dried, and then ground into a fine powder. This means it packs a serious punch of flavor in just a tiny amount.
Espresso powder differs from instant coffee in its production process and flavor profile. Instant coffee is made from brewed regular coffee that's dehydrated, while espresso powder is made from brewed espresso beans. The flavor of espresso powder is more intense and richer compared to instant coffee, making it ideal for various culinary uses.
Espresso powder has a variety of uses. It's a popular baking ingredient, adding depth to chocolate cakes, brownies, and cookies. Its robust coffee flavor can enhance savory dishes like meat rubs and sauces. It's also perfect for making rich coffee drinks or even coffee-flavored cocktails.
Benefits of making your own espresso powder
Making your own espresso powder at home has several perks. First, it's cost-effective. You save money by using your own coffee beans instead of buying pre-made powder. Second, making your own allows you to customize the flavor to your liking by choosing your preferred beans and controlling the roasting process. Third, homemade espresso powder ensures freshness since you avoid preservatives and have full control over the quality.
Step 1: choosing the right coffee beans
The journey to excellent espresso powder starts with picking the right beans. For the best flavor, go for high-quality Arabica beans. These beans are known for their smooth, complex flavors. On the other hand, Robusta beans have more caffeine and a stronger, sometimes bitter taste. Freshness is key, so make sure your beans are recently roasted. This ensures that the flavor is at its peak when you start the process.
Step 2: brewing a strong espresso

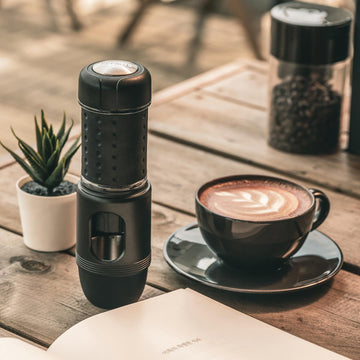
Next, brew a strong shot of espresso. You don't need a fancy espresso machine, but if you're looking to upgrade, check out STARESSO's range of portable espresso machines. Here's a quick guide to brewing a perfect shot. Start by grinding your beans finely. Then, tamp the grounds firmly in the portafilter. Use high-quality water at around 200°F (93°C) and brew for about 25-30 seconds. This will give you a rich, concentrated espresso that's perfect for making powder.
Step 3: drying the espresso grounds
After brewing, you need to dry the espresso grounds. Spread the used grounds evenly on a baking sheet. You have two options: oven drying or air drying. For oven drying, preheat your oven to its lowest setting (around 200°F or 93°C) and bake the grounds for about an hour, stirring occasionally. For air drying, spread the grounds on a baking sheet and leave them out in a dry, cool place for a few days, stirring occasionally. Make sure the grounds are completely dry to avoid any mold.
Step 4: grinding the dried espresso grounds
Once your grounds are dry, it's time to grind them into powder. Use a burr grinder for the best consistency, like STARESSO's Discovery II Grinder. A blade grinder works too, but it won't produce as consistent results. Grind the dried espresso until it's a fine, smooth powder. Be careful not to over-grind, as this can heat the grounds and affect the flavor.
Step 5: storing your homemade espresso powder
Store your freshly made espresso powder in an airtight container to keep it fresh. A dark, cool place is ideal. Properly stored, it can last for several months. An airtight container ensures no moisture gets in, which is crucial to maintain its flavor and potency.
Tips for using espresso powder in recipes

Now that you've made your espresso powder, here's how to put it to good use. Espresso powder can enhance chocolate desserts by adding a teaspoon to chocolate cake batter or mixing it into brownie or cookie dough for a rich, deep taste. It also adds depth to savory dishes when combined with spices to make a rub for steak or pork, or stirred into chili or barbecue sauce for a unique twist. For beverages, mix it into your morning smoothie for a coffee kick or use it in coffee-flavored cocktails like an espresso martini.
Troubleshooting common issues when making espresso powder
If you encounter clumping, make sure your powder is completely dry before storing and consider using a desiccant pack in your container to absorb any moisture. To ensure consistent flavor, stick to the same type of beans and brewing method each time and taste test to make sure each batch has the same intensity. If your powder tastes off, it might be stale, so always store it properly and check the expiration date of your beans. If it's too bitter, try using a different type of bean or adjusting your brew time.
Making espresso powder at home is a rewarding project that adds a personal touch to your cooking and baking. By following these simple steps, you can create a fresh, flavorful powder that will enhance your recipes and impress your friends and family. Plus, you get to play around with different beans and roasting levels to create your perfect blend.
Ready to try it out? Grab some quality beans and start brewing!
Espresso powder frequently asked questions
How does espresso powder differ from ground coffee?
Espresso powder is much finer and more concentrated, ideal for recipes.
What type of coffee beans are best for making espresso powder?
High-quality Arabica beans are preferred for their smooth flavor.
Can I use regular coffee instead of espresso powder in recipes?
You can, but espresso powder offers a more intense flavor.
How long does homemade espresso powder last?
When stored properly, it can last for several months.


